TL;DR
Acoustic dampening inside a closet improves sound clarity by reducing reflections, but true noise control comes from smart placement and sealing gaps. Moving your rig into a closet with proper ventilation and strategic treatment can make your recordings clearer and quieter without sacrificing convenience.
Ever wondered why your closet might be the perfect spot for your home studio? It’s not just about hiding a noisy rig — it’s about making that space work *for* you. When you treat a closet right, it becomes a mini-sound booth, dramatically cutting down reflections and echoes, and letting your voice or instrument shine through.
But here’s the catch: it’s not just about sticking foam on the walls. The real magic lies in understanding how sound travels, where to place your gear, and how to keep that hot, noisy machine cool enough to run 24/7. This guide breaks down practical tips so you can turn a tiny closet into a quiet, effective recording space.
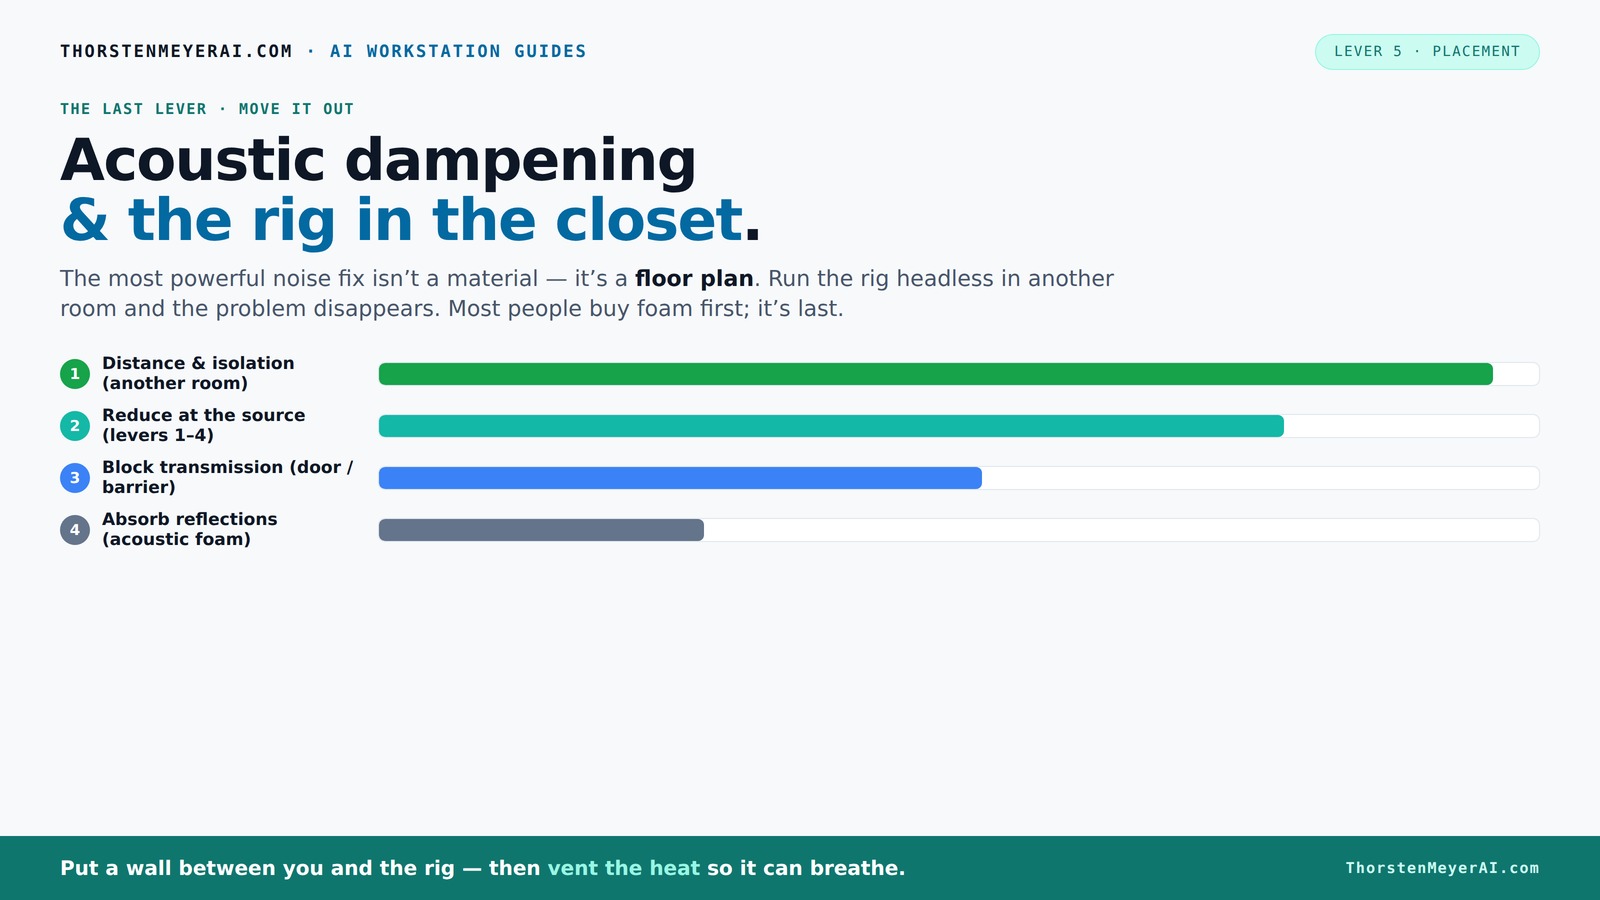
Acoustic dampening
& the rig in the closet.
The most powerful noise fix isn’t a material — it’s a floor plan. A rig you can’t hear because it’s in another room beats any amount of foam. Tap the approaches in Part 1 to see what actually works.
(another room)
(levers 1–4)
(door / barrier)
(acoustic foam)
Contain the noise, not the heat
Key Takeaways
- Acoustic dampening inside a closet reduces echoes but doesn't block sound transmission; sealing gaps and barriers are essential for true silence.
- Proper mic placement and reflection management are critical to getting clean recordings in small, reflective spaces.
- Sealing doors and cracks can cut ambient noise by up to 30%, making a big difference in your recording quality.
- Thick blankets and dense materials outperform foam in small spaces, especially for low-frequency control.
- Ventilation is non-negotiable when placing a rig in an enclosed space; ducted airflow prevents heat buildup and noise escalation.
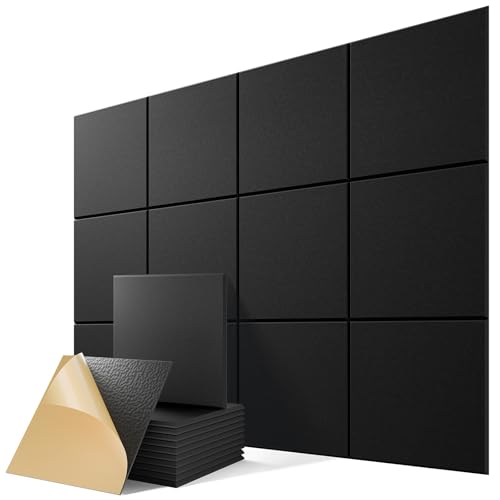
12 Pack Self-Adhesive Sound Proof Foam Panels for Walls 12"x12"x0.4" Fabric
Superior Noise Reduction & Echo Cancellation - Tired of background noise and poor acoustics? Our soundproof wall panels...
As an affiliate, we earn on qualifying purchases.
As an affiliate, we earn on qualifying purchases.
What Acoustic Dampening Actually Does — And What It Doesn’t
Acoustic dampening inside a closet reduces echoes and flutter echoes, making your recordings sound clearer. Thick blankets, acoustic panels, and foam absorb sound waves bouncing around, softening the inside of your tiny space.
However, dampening doesn’t block sound from escaping or entering. It’s about controlling how sound behaves *inside* the space, not sealing the room from outside noise. For example, a thick blanket on the door reduces internal reflections but won’t stop your neighbor’s loud music from sneaking in.
According to recent DIY trends, layered blankets and rugs can cut reflections significantly, especially in tight spaces. But for true isolation, sealing gaps around the door and using barriers matter more.
Understanding this distinction is crucial because it influences how you allocate your resources. Over-relying on dampening materials without addressing gaps can give a false sense of soundproofing, leading to frustration. The tradeoff: dampening improves clarity within your space but does little to prevent outside noise from intruding or leaking out. For serious privacy or noise reduction, combining dampening with sealing methods becomes essential, even if it complicates the setup slightly.

Focusound 52 Pack Acoustic Foam Panels 1" x 12" x 12" Sound Proof Foam Panles Soundproofing Noise Cancelling Wedge Panels for Home Office Recoding Studio with 300PCS Double-Side Adhesive
Soundproofing - Acoustic foam panels triangular grooves structure for better noise absorption, helps to reduce and absorb unwanted...
As an affiliate, we earn on qualifying purchases.
As an affiliate, we earn on qualifying purchases.
Where to Place Your Microphone for the Cleanest Sound in a Closet
Positioning your mic correctly is crucial in a small, reflective space like a closet. The goal: minimize early reflections that color your sound.
Start by placing the mic about 6-12 inches away from your mouth, and experiment with angles to avoid direct reflections off the walls or ceiling. The first reflection points — the spots where sound bounces directly into the mic — should be treated with absorptive materials.
For example, if you're recording vocals, position the mic slightly above your mouth and angle it downward, facing away from the closet walls. Use a reflection filter or a small foam panel behind the mic to block those early echoes, creating a clearer, more natural sound.
Deeply understanding why this matters: improper placement can cause your recordings to sound distant or echoey, forcing you to do extra editing later. Proper placement minimizes room coloration at the source, saving time and improving quality. The tradeoff involves balancing proximity to reduce room effects while avoiding proximity effect distortion or muffling. Using reflection filters adds cost but significantly enhances clarity, especially in tight spaces where reflections are unavoidable. The key is to think of your mic as a window into your voice or instrument: position it where it captures your sound directly, not the room’s.

VEVOR Portable Vocal Booth, 6.56 ft Height, Portable Recording Studio with Travel Bag, Mobile Tablet Stand, Thickened Soundproofing, Sound Isolation Booth for Echo-Free Vocals, Podcasts, Voiceovers
Say Goodbye to Echoes: Built with durable Oxford cloth and acoustic padding, this recording booth for the home...
As an affiliate, we earn on qualifying purchases.
As an affiliate, we earn on qualifying purchases.
Seal the Door and Gaps — Your Secret for Quieter Recordings
Doors and cracks are the biggest weak points for sound leakage. Sealing gaps with weatherstripping or draft stoppers can reduce noise entry and exit dramatically.
In tight closets, even tiny cracks around hinges or door frames can let in or leak out sound. Use foam weatherstripping along the door frame, and consider a door sweep if there's a gap at the bottom. For added soundproofing, attach a heavy curtain or a solid core door if possible.
Think of it like sealing a fish tank: the tighter the seal, the less noise leaks. This simple step can cut down ambient noise by 20-30%, making your recordings much cleaner.
Beyond just reducing noise, sealing gaps can also improve the overall acoustic environment by preventing external sounds from bouncing in and muddying your recordings. The tradeoff: sealing can sometimes make the space feel more enclosed or claustrophobic, but the improvements in clarity and noise reduction often outweigh this minor inconvenience. For serious setups, investing in robust sealing solutions ensures that your efforts in dampening and treatment aren’t undermined by simple gaps.

Ekkogo Studio Monitor Isolation Pads Premium Acoustic Foam Elevates Audio Ideal for 5 Inch Speakers Enhanced with Vibredux HD Foam for Superior Isolation
【ADVANCED VIBREDUX HD FOAM】: Experience the acoustic excellence of Vibredux HD foam with Ekkogo's Studio Monitor Isolation Pads....
As an affiliate, we earn on qualifying purchases.
As an affiliate, we earn on qualifying purchases.
Blankets, Panels, and Foam — What Works Best in Tiny Spaces?
In small closets, dense materials like moving blankets or thick acoustic panels outperform thin foam. The reason: thicker materials absorb lower frequencies better, which are common in computer rigs and room echoes.
For a DIY approach, hang a few blankets over the walls or ceiling, and layer them for more absorption. Acoustic panels are great but can be pricey; a combo of blankets and DIY panels can be just as effective.
Deep understanding of materials is key: thicker blankets and dense panels act like barriers that slow down and absorb sound waves more effectively than lightweight foam. This means they can reduce not only high-frequency reflections but also tackle the problematic lower frequencies that cause muddiness. The tradeoff involves cost and effort; DIY solutions are budget-friendly but may require more installation time and less precise absorption. Commercial panels are engineered for specific frequencies but often come with a higher price tag. The best approach balances effectiveness and budget, recognizing that in small spaces, dense, thick materials yield the most significant improvements in clarity and bass control.
Bass Traps and Managing Low Frequencies in Tiny Rooms
Low-end buildup happens fast in small, parallel-walled spaces. Bass traps are essential to tame this—especially if you’re recording vocals or instruments that produce deep sounds.
Place bass traps in corners where low frequencies tend to concentrate. Even thick insulation or dense foam panels can help, but dedicated bass traps offer the best control because they are designed specifically to absorb low-frequency energy, which tends to accumulate in corners and along walls.
Ignoring low-frequency treatment often results in muddy recordings with pronounced boomy spots that distort your sound. For example, a podcaster I know added DIY bass traps made from dense rockwool in the closet corners. The result: a much more balanced sound, with fewer boomy spots and clearer voice recordings. The tradeoff: bass traps can be more expensive and space-consuming, but their impact on clarity, especially for voice and bass instruments, makes them indispensable in tight spaces.
Ventilation and Cooling — Keeping a Closet Rig Alive and Happy
Putting a hot, high-performance rig in a closet is a recipe for overheating — unless you plan for airflow. Good ventilation isn’t just about comfort; it’s about keeping your hardware cool and noise levels down.
Use passive vents or small exhaust fans to pull hot air out and draw cooler air in. For example, a quiet, low-speed fan mounted in a vent hole can move heat without adding noise, preventing thermal throttling.
Proper ventilation impacts your setup profoundly because overheating can cause hardware failures, thermal throttling, and increased fan noise, which defeats your quiet recording goals. Ducted airflow or even small, dedicated cooling systems can be integrated into your closet design, but they require careful planning to avoid introducing new noise sources. For instance, a well-designed duct system can channel heat out while keeping noise minimal, maintaining a balance between temperature control and acoustic isolation. Read more about this approach in the article on [reducing heat and noise in a high-power AI workstation](https://thorstenmeyerai.com/reduce-heat-noise-ai-workstation/). The tradeoff involves complexity and cost, but neglecting cooling can compromise both your hardware and your sound quality.
The 'Rig in the Closet' — Is It Worth the Effort?
Yes, if you treat it right. Moving your noisy, heat-generating rig into a closet can cut down on sound transmission and keep your workspace quiet. But it’s not a set-it-and-forget-it solution.
You must provide ventilation, seal gaps, and add proper acoustic treatment. Otherwise, heat will build up, fans will ramp up, and noise will win. It’s a balancing act, but one worth mastering for a cleaner workspace.
For example, many AI researchers run their servers in closet setups with ducted airflow and layered blankets, achieving both silence and cool operation. It’s a practical, scalable solution for serious workloads. The tradeoff: without proper planning, you risk overheating or creating a space that’s too confined, which can lead to increased noise and hardware issues. But when carefully implemented, closet rigs offer a cost-effective way to achieve near-silent operation while maintaining high performance.
Frequently Asked Questions
Is acoustic foam enough for a closet studio?
Acoustic foam helps reduce echo and flutter, making your recordings clearer. But it won’t block sound from leaking out. For true silence, you need sealing and barriers along with foam.Where should I place the mic in a closet for the best sound?
Position the mic about 6-12 inches from your mouth, angled to avoid direct reflections. Use reflection filters or panels behind the mic to tame early echoes and get a natural sound.Should I treat the walls, ceiling, or corners first?
Start with the first reflection points — behind and around the mic — then focus on corners for low frequencies. Sealing gaps is also critical for reducing noise leaks.Do I need bass traps in a tiny closet?
Yes. Small spaces tend to trap low frequencies, causing boomy spots. DIY bass traps or dense panels in corners can make your sound tighter and more balanced.How do I stop sound from leaking through the door?
Seal the gaps around the door with weatherstripping and add a heavy curtain if needed. This simple step can significantly reduce sound escaping or entering the space.Conclusion
Turning a closet into a mini studio is a smart move when done right. It’s about more than just slapping foam on the walls — it’s about thoughtful placement, sealing gaps, and managing heat.
If you treat your closet as a controlled environment, it becomes a powerhouse of clean, quiet recordings. Remember, the best soundproofing is distance and smart airflow — everything else is just fine-tuning.